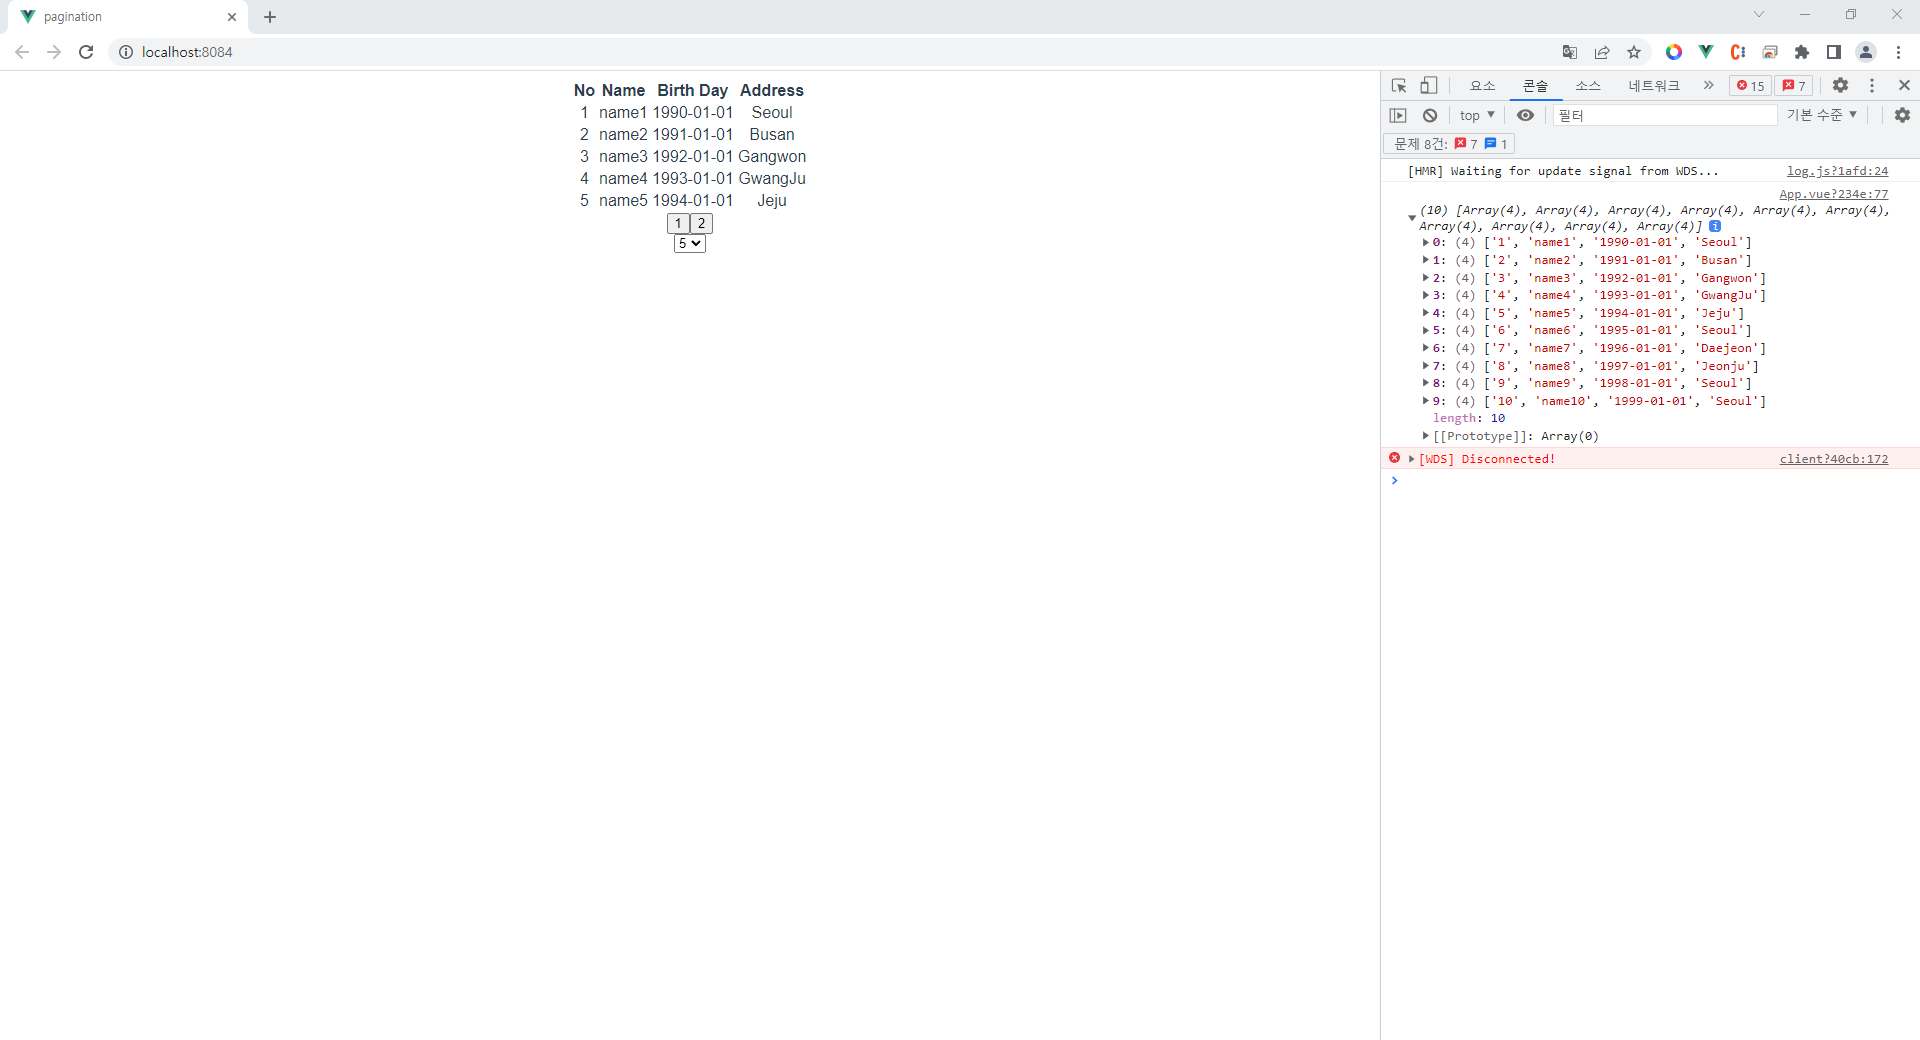
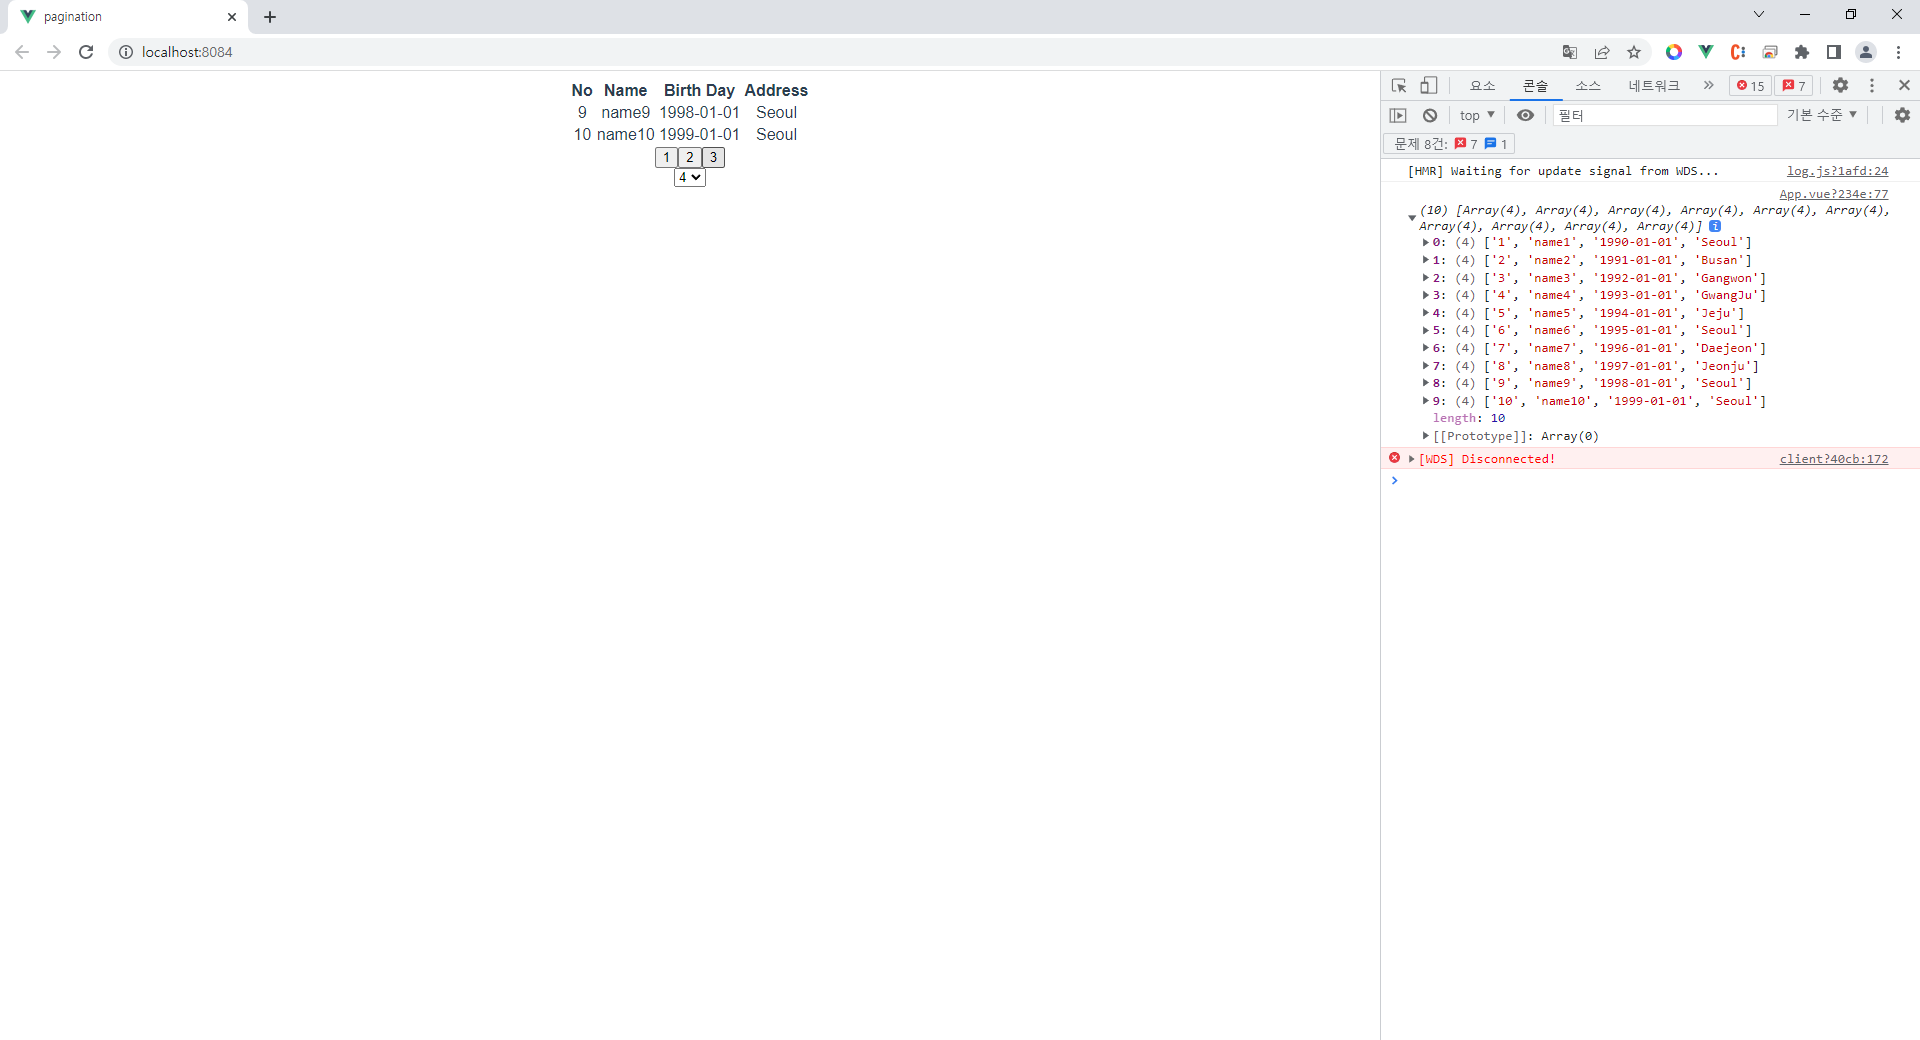
먼저, 1차원 배열을 Json으로 만들고 v-for를 활용하여 table에 보여지도록 만들어야 했다.
template 작성
<template>
    <div id="app">
        <div>
            <table>
                <thead>
                    <th>No</th>
                    <th>Name</th>
                    <th>Birth Day</th>
                    <th>Address</th>
                </thead>
                <tr v-for="(data, index) in copyArr" :key="index">
                    <td>{{ data.no }}</td>
                    <td>{{ data.name }}</td>
                    <td>{{ data.birth }}</td>
                    <td>{{ data.addr }}</td>
                </tr>
            </table>
        </div>
        <div>
            <div>
                <button v-for="(tdItem, idx) in pageNum" :key="idx" @click="bntClick(idx)" :value="idx">{{idx+1}}</button>
            </div>
            <div>
                <select v-model="setSize" @change="setPageSize()">
                    <option v-for="size in pageSize" :key="size" :value="size">{{size}}</option>
                </select>
            </div>
        </div>
    </div>
</template>
script 작성
<script>
export default {
    data: function () {
        return {
            arr: ['1', 'name1', '1990-01-01', 'Seoul',
                  '2', 'name2', '1991-01-01', 'Busan',
                  '3', 'name3', '1992-01-01', 'Gangwon',
                  '4', 'name4', '1993-01-01', 'GwangJu',
                  '5', 'name5', '1994-01-01', 'Jeju',
                  '6', 'name6', '1995-01-01', 'Seoul',
                  '7', 'name7', '1996-01-01', 'Daejeon',
                  '8', 'name8', '1997-01-01', 'Jeonju',
                  '9', 'name9', '1998-01-01', 'Seoul',
                  '10', 'name10', '1999-01-01', 'Seoul'],
            copyArr: [], // 화면에 보여질 데이터를 담는 배열
            setSize: 5, // 배열 기본 길이
            setPage: 0, // 기본 페이지
            pageSize: [2, 4, 5], //
            pageNum: 1, // 페이지 수 담을 변수
        }
    },
    methods: {
        chunk: function (arr, size) { // 배열 size에 맞게 나누기
            let i =0, j = arr.length, tmpArr = [];
            for(i = 0; i < j-1 ; i += size) {
                tmpArr.push(arr.slice(i, i + size));
            }
            return tmpArr;
        },
        setPageSize: function () {
            this.copyArr = []; // 배열 초기화
            this.copyArr = (this.paginate(this.arr, 0, this.setSize)); // 화면에 보여지는 배열
            this.pageNum = Math.ceil(this.arr.length / this.setSize); // 페이지 개수
        },
        paginate: function (array, pageIndex, pageSize) {
            const first = pageIndex * pageSize
            const last = (pageIndex * pageSize) + pageSize
            return array.filter((_, index) => {
                return first <= index && index < last
            })
        },
        bntClick: function (idx) {
            this.copyArr = []; // 배열 초기화
            this.copyArr = (this.paginate(this.arr, idx, this.setSize)); // 화면에 보여지는 배열
        },
        setData: function () {
            let tmp = this.chunk(this.arr, 4); // 나눈 배열 담기
            console.log(tmp);
            let tmpArr = []; // 임시 배열 만들기
            for(let i = 0; i < tmp.length; i++) { // 나눈 배열을 임시 배열에 json형태로 넣기
                tmpArr.push({
                    no: tmp[i][0],
                    name: tmp[i][1],
                    birth: tmp[i][2],
                    addr: tmp[i][3],
                })
            }
            this.arr = tmpArr; // arr에 json 넣기
            this.setPageSize();
            this.pageNum = this.arr.length / this.setSize;
        },
    },
    mounted() {
        this.setData();
    }
}
</script>
style 작성
<style>
#app {
  font-family: Avenir, Helvetica, Arial, sans-serif;
  -webkit-font-smoothing: antialiased;
  -moz-osx-font-smoothing: grayscale;
  text-align: center;
  color: #2c3e50;
  display: flex;
  flex-direction: column;
  align-items: center;
}

#nav {
  padding: 30px;
}

#nav a {
  font-weight: bold;
  color: #2c3e50;
}

#nav a.router-link-exact-active {
  color: #42b983;
}
</style>


오른쪽에 [WDS] Disconnected! 이건 왜 뜨는지 모르겠다.
반응형
'공부합시다 > Vue' 카테고리의 다른 글
| [Vue.js 2] Query String에서 필요한 값만 가져오기 (0) | 2022.08.29 |
|---|---|
| [Vue.js 2] 삼항연산자로 이미지 바꾸기 (2) | 2022.08.17 |
| [Vue.js 3] 원하는 경로로 바로 이동(redirect) (0) | 2022.04.22 |
| [Vue.js 3] store에서 ws 모듈 사용하기 (0) | 2022.04.15 |
| [Vue.js 3] 새로고침 데이터 유지(pinia-plugin-persistedstate-2) (0) | 2022.04.15 |